In this post, I will introduce you to SvelteKit – a powerful and easy to use framework for building server-side rendered web applications. I've used the predecessor to SvelteKit, Sapper but things have moved on quite a bit since then so let's see how SvelteKit has evolved!
I've recently been writing about Next.js where we created a simple app to try out the main features, lets's do the same with SvelteKit.
Create the app
I used the command pnpm create svelte@latest daily-top-3-svelte to create the app and selected Skeleton project, Typescript, ESlint, Prettie, Playwright and Vitest. Nice set of default options 🤩.
pnpm create svelte@latest daily-top-3-svelte
create-svelte version 3.1.1

┌  Welcome to SvelteKit!
│
◇  Which Svelte app template?
│  Skeleton project
│
◇  Add type checking with TypeScript?
│  Yes, using TypeScript syntax
│
◇  Select additional options (use arrow keys/space bar)
│  Add ESLint for code linting, Add Prettier for code formatting, Add Playwright for browser testing, Add Vitest for unit testing
│
└  Your project is ready!

✔ Typescript
  Inside Svelte components, use <script lang="ts">

✔ ESLint
  https://github.com/sveltejs/eslint-plugin-svelte3

✔ Prettier
  https://prettier.io/docs/en/options.html
  https://github.com/sveltejs/prettier-plugin-svelte#options

✔ Playwright
  https://playwright.dev

✔ Vitest
  https://vitest.dev
Start-up
We do the usual install and start-up commands:
pnpm install
pnpm dev
This gives the bare bones app page:

Great, everything is running. Let's get some data on the page.
Database Setup
For the database, we'll be using Postgres in Docker and Prisma to access the data. I won't go into detail here, but you can check out my previous post on Next.js for full step-by-step instructions.
Docker Compose
The YAML configuration file used to setup Docker with Postgres:
version: '3.8'
services:
  db:
    image: postgres:14.1-alpine
    restart: always
    environment:
      - POSTGRES_USER=postgres
      - POSTGRES_PASSWORD=postgres
    ports:
      - '5432:5432'
    volumes:
      - db:/var/lib/postgresql/data
volumes:
  db:
    driver: local
We can now start the database up with docker-compose up.
Prisma Setup
Install:
pnpm install prisma @prisma/client --save-dev
pnpx prisma init
Update the generated .env file in the project route with:
DATABASE_URL="postgresql://postgres:postgres@localhost:5432/DailyTop3"
Then update the Prisma schema:
// This is your Prisma schema file,
// learn more about it in the docs: https://pris.ly/d/prisma-schema

generator client {
  provider = "prisma-client-js"
}

datasource db {
  provider = "postgresql"
  url      = env("DATABASE_URL")
}

model Top3 {
  id        Int      @id @default(autoincrement())
  createdAt DateTime @default(now()) @db.Date
  todos     Todo[]
}

model Todo {
  id       Int     @id @default(autoincrement())
  title    String
  complete Boolean @default(false)
  Top3     Top3    @relation(fields: [top3Id], references: [id], onDelete: Cascade)
  top3Id   Int
}
Seed the database
We can seed the database with some test data, first install a couple of libraries to allow the seed file to run:
pnpm install -D typescript ts-node @types/node
Then create a seed.ts file to create the data:
import { PrismaClient } from "@prisma/client";
const prisma = new PrismaClient();
async function main() {
  const top3 = await prisma.top3.upsert({
    where: {
      id: 1,
    },
    update: {},
    create: {
      todos: {
        create: [
          { title: "Research SvelteKit", complete: false },
          { title: "Write SvelteKit article", complete: false },
          { title: "Publish SvelteKit article", complete: false },
        ],
      },
    },
  });
  console.log({ top3 });
}
main()
  .then(async () => {
    await prisma.$disconnect();
  })
  .catch(async (e) => {
    console.error(e);
    await prisma.$disconnect();
    process.exit(1);
  });
Update the package.json file:
{
  ...
    "prisma": {
        "seed": "ts-node --esm prisma/seed.ts"
    }
  ...
}
Create and seed the database
pnpx prisma db push --force-reset
pnpx prisma db seed
pnpx prisma generate
That's all the database setup done, back to SvelteKit.
Fetch the data
We want to fetch the data server side and have that data available on the client. In SveleteKit we do this by defining a load function. We want this load function to run server-side so we create a file called +page.server.ts. For more info on loading data see the SvelteKit docs.
import type { PageServerLoad } from './$types';
import { prisma } from '../../lib/prisma';
import type { Top3 } from '@prisma/client';

export const load = (async () => {
    const top3 = await prisma.top3.findFirst({
        where: {
            createdAt: {
                equals: new Date()
            }
        },
        include: {
            todos: {
                orderBy: {
                    id: 'asc'
                }
            }
        }
    });

    if (!top3) throw Error('NO DATA!');

    return top3;
}) satisfies PageServerLoad<Top3>;
With the data loaded we can now import and make it available to the svelte component page +page.svelte. Notice the Prisma Client has generated type models for us and those types are passed through to the page. This means we get safely typed code and great IntelliSense 🚀.
<script lang="ts">
  import type { PageData } from './$types';
  export let data: PageData;
</script>


<div>
  <h1>Top 3</h1>

  <ol>
    {#each data.todos as todo}
      <li>
        {todo.title}
      </li>
      {/each}
  </ol>
</div>
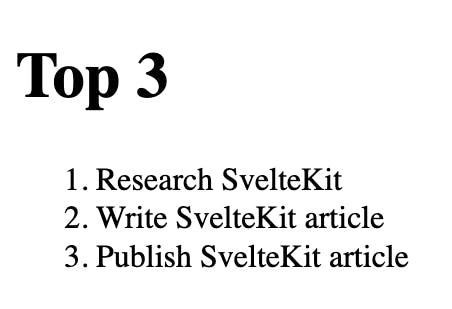
This renders our data to the page:

Whoop! We've got data from the database to the page.
This post is getting long so I leave it here for now, next time we'll look at creating and updating the daily top 3 tasks.
You can grab the code from the Github Repository.

